 In the midst of life’s craziness, what could be better that some moments of joyful simplicity with our little ones? The pace of life in our household has been quite frantic the past several weeks (hence my utter negligence in posting!). But no matter how harried the pace, we make an effort to savor un-rushed moments with our munchkin every day. One of the best of those moments happened a couple of weeks ago, as my hubby, my munchkin and I literally sat in the dirt together and created our very own “bug box”. It was one of those joyfully simple moments that I cherish. It cost us not a penny. And my daughter’s eyes were wide with wonder…
To create your own bug box, you will need…
An empty clear plastic container with a lid (large salad containers work particularly well)
Masking tape
A small shovel
Garden gloves (optional)
A garden space suitable for bug hunting!
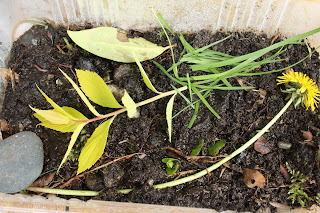
Punch some small air holes in the lid of your plastic container. Then simply sit with your child and dig in the dirt! Talk about all of the amazing things you discover together – bugs, rocks, grass, twigs, leaves, dirt – the options are endless! Sprinkle a little dirt at the bottom of your bug box, then collect items to create your bug habitat – some sticks and rocks for variety, and some leaves and greenery for your bugs to eat. Hunt for bugs to live in your bug box – worms, beetles, snails – whatever you are able to find. Take your time and enjoy the hunt! When you are finished, securely tape the lid to your bug box so that your child can explore it from every angle without the worry of bugs and dirt spilling everywhere.
Helpful Hints:
· Scatter only a small amount of dirt at the bottom of the box. If you use too much dirt, the bugs will hide in it and your child won’t be able to see them.
· Add water to your bug box (daily if you plan to keep it for a while), as bugs get thirsty too.
· Slugs shouldn’t be kept overnight as they tend to dry out (lesson learned in my own childhood!). Snails are fantastic as they creep along the sides of the box and are very interesting to watch.
This is a fabulous activity for promoting language development , as little ones will be fascinated and there are endless topics to talk about together! And the memories you build are the kind that last for a lifetime. Happy bug hunting, joyful mommies!
